I was inspired to make an extra special birthday card for an extra special friend.
Using heavy gauge watercolour paper, I cut out a nine petal simple flower shape leaving a good sized circular shape in the middle (which will help with cleaner/sharper folding later on).
Using water colours I painted the back of the flower in funky spots and, once dry, the front of the petals in gorgeous yellow tones. My message was then written across the centre of the flower before folding all the petals inwards, laying one petal on top of the next. I attached this to a card blank and also made a little 'open me' tag to add the finishing touch! So sweet.
Tuesday 31 July 2012
Monday 30 July 2012
Crochet Necklaces - a Mollie Makes tutorial
As part of Mollie Makes's Tutorial Tuesday, last week they released a tutorial by Carol Meldrum on how to crochet a necklace and we fell completely in love! Having recently learnt to crochet, we just could not resist having a go at these necklaces. We made one of each of the necklaces, the green one is the 'shell' trim necklace, made with DK yarn and the white one is the 'arch' trim necklace made with 4ply yarn and a 1.75mm hook. Instead of adding the button to link the ends as the tutorial says, we added ribbon ties which, we think, make the necklaces look even more adorable! The necklaces were really quick to make and the tutorial was brilliant. We love them!
Beads? Wire? Ribbon?.....Necklace!!
I made around 20 wire loops of around 20 beads per loop (although this would depend on your personal necklace length preference and the size if bead you wish to use) and interlinked them as I made each one. Several of the loops were made up of more than one colour too. One I had achieved the required necklace length, I sewed on a scrap of ribbon for around the back of the neck but this would also look pretty with two ribbons tied in a bow!
Fabulous Flowers!
These beautiful flower brooches are made from strips taken from an old jumper.....hard to believe, I know!
First, cut a strip approx 2cm wide x 12cm long. Fold in half lengthways with right sides together then roll from narrow end to narrow end to form the centre of the flower. Secure by pushing a threaded needle right through the roll, then finish off. The folded edge of the roll will be the right side of your flower.
To make the petals, cut another strip approx 2cm wide x 23cm long. Fold in half lengthways with right sides together. Make a loop of the strip, place over your completed flower centre and join with a couple of stitches. Then push needle right through centre and then through the centre of the loop on the opposite side effectively making two new loops around the flower centre. Push the needle through the flower centre and through the centre of first one loop then the other, effectively creating four loops. Continue in this way until you have your required number of loops/petals.
Once finished, sew a pin to the back. I also sewed a sprinkling of seed beads to the centre to add a bit of sparkle!
Sunday 29 July 2012
Homemade Macaroons
Today, In a break from crochet in front of the Olympics, we made our own macaroons! We fell in love with macaroons a little while ago in London, so thought that we'd make our own. We used the recipe for 'Mocktail Macaroons' from the Great British Bake Off Book which gave three different flavours, mint and lime, cranberry and orange and pineapple jam. This was the first time we'd made macaroons so it was somewhat of an experiment! However, they worked really well and were just the right gooey consistency in the middle. The cranberry and orange macaroons worked the best, as they stayed in beautiful circle shapes but the tastiest were easily the mint and lime ones! Lovely! We are rather proud of them, they look wonderful...and taste wonderful too!
Saturday 28 July 2012
Breakfast at Liberty (and other London adventures!)
After the success of our last trip to London, we decided to go back again (although this time it was Friday 13th). This time we wanted to have breakfast at our new favourite haunt, Liberty London. Now, after the worldwide obsession (particularly on Instagram) with Macaroons, it seemed ridiculous that neither of us had ever tried one, so we did! At Café Liberty we had toasted teacakes with marmalade and jam, then a trio of the most delicious macaroons! They were utterly beautiful and we are now completely in love! After leaving Liberty we walked down Oxford Street, something that was impossible last time due to the great British weather! We made a quick stop in Forever 21, a store we discovered last summer on our travels in New York and adored the prints of the fabrics. We love how refreshing the fashions are in comparison to the shops we are all used to.
Following this, we made our way to Covent Garden, to the Tatty Devine store. We have coveted Tatty Devine for a while now, and we were really excited when we heard that they had installed an in-store laser-cutter which meant that we could get personalised name necklaces done while we waited! A went for a crafty-inspired 'Thimble' in tortoiseshell perspex and C went for the rather fantastic 'Harrumph!' in black. We love them and are so pleased to have our own Tatty Devine pieces!
After our visit to Tatty Devine, we made our way over to the Tate Modern to see the Damien Hirst Exhibition. It was fantastic! We were particularly taken with the butterfly series and his cabinets of industrial diamonds! They were beautiful yet disconcerting at the same time. The butterflies were still stunning even after their death and that was striking. We also adored the live butterfly exhibit. It was incredible to be that close to huge, tropical butterflies, to see their beauty alive! It was magical.
We had a truly lovely day and can't wait for our next trip to London!
Thursday 26 July 2012
Jubilee Guards Egg-Cup Pin-Cushion
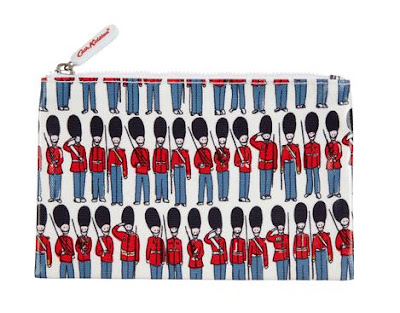
Around the time of the Queen's Diamond Jubilee, we painted a series of pottery items with images of Guards in true British style. We are obsessed with the red, white and blue colour-scheme and the fantastic bus, guard and taxi iconography. With this in mind, we took inspiration from the guards range by Cath Kidston but put our own spin on them.
Photo: Cath Kidston
Photo: The Makery Online
We fell completely in love and it was decided, that we would make our egg-cup into a pin cushion too! It was really simple, we just covered some toy-stuffing with red fabric then glued it into the egg cup. We love it!
The Beginnings of a Crochet Obsession
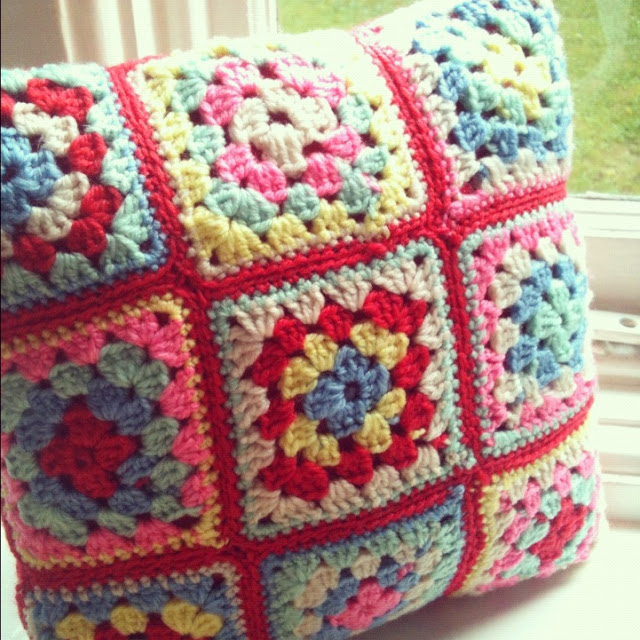
We apologise for being a bit quiet recently, things have been manic and it has been hard finding the time to write up all our creations. However, we thought we'd start with the beginning of our new-found obsession with crochet. Just over two months ago, we made a crochet cushion from Cath Kidston's 'The Crochet Book' kit. This really was a project for beginners but was really, really fun and the skills gained through making this cushion have lead onto other, more advanced crochet projects (which will follow soon). Crochet is such a beautiful craft, so therapeutic and quicker than knitting. We have fallen completely in love!
Subscribe to:
Posts (Atom)


